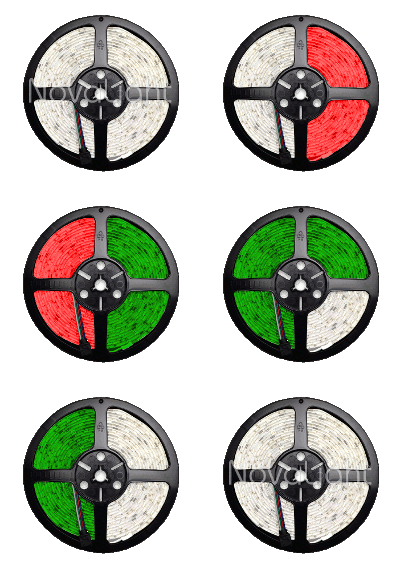
Diferencias entre tiras led RGB Multicolor y tiras led SMART(Inteligentes, Direccionables, Digitales, Neopixel…)
Con las tiras led RGB controlamos el color de toda la tira a la vez. Si cambiamos el color, cambiara el de toda la tira a la vez.

Con las tiras Direccionables controlamos led por led de la tira independientemente.

Existen varios tipos dentro de los Neopixel: WS2801, WS2811, WS2812B, WS2813… cada uno con sus particularidades respecto al otro.
Componentes Necesarios:
- NodeMcu ESP8266 cp2102 –> 2,77€
- Tira led de WS2812B 1m PCB White 30leds/m no waterproof –> 2,14€
- Convertidor de Nivel Logico 3.3v a 5v Bidirecccional (Level Converter)–> 0,32€
- Fuente Alimentacion 5v 8A 40W–> 7,32€
TOTAL: +/- 13€
![]()
Controlador
Nos ayudaremos de la libreria de Neopixel de Adafruit.
En Platformio la libreria es la nº28.
Y usaremos su código de ejemplo (tendremos que cambiar solamente el pin de control que pongamos (PIN), y el numero de leds a controlar (NUMPIXELS):
// NeoPixel Ring simple sketch (c) 2013 Shae Erisson
// released under the GPLv3 license to match the rest of the AdaFruit NeoPixel library

#include <Adafruit_NeoPixel.h>
#ifdef __AVR__
  #include <avr/power.h>
#endif

// Which pin on the Arduino is connected to the NeoPixels?
// On a Trinket or Gemma we suggest changing this to 1
#define PIN            6

// How many NeoPixels are attached to the Arduino?
#define NUMPIXELS      16

// When we setup the NeoPixel library, we tell it how many pixels, and which pin to use to send signals.
// Note that for older NeoPixel strips you might need to change the third parameter--see the strandtest
// example for more information on possible values.
Adafruit_NeoPixel pixels = Adafruit_NeoPixel(NUMPIXELS, PIN, NEO_GRB + NEO_KHZ800);

int delayval = 500; // delay for half a second

void setup() {
  // This is for Trinket 5V 16MHz, you can remove these three lines if you are not using a Trinket
#if defined (__AVR_ATtiny85__)
  if (F_CPU == 16000000) clock_prescale_set(clock_div_1);
#endif
  // End of trinket special code

  pixels.begin(); // This initializes the NeoPixel library.
}

void loop() {

  // For a set of NeoPixels the first NeoPixel is 0, second is 1, all the way up to the count of pixels minus one.

  for(int i=0;i<NUMPIXELS;i++){

    // pixels.Color takes RGB values, from 0,0,0 up to 255,255,255
    pixels.setPixelColor(i, pixels.Color(0,150,0)); // Moderately bright green color.

    pixels.show(); // This sends the updated pixel color to the hardware.

    delay(delayval); // Delay for a period of time (in milliseconds).

  }
}
Efecto Arcoiris:
#include <Adafruit_NeoPixel.h>

// constants won't change. They're used here to
// set pin numbers:
const int ledPin = 4;     // the number of the neopixel strip
const int numLeds = 30;

//Adafruit_NeoPixel pixels = Adafruit_NeoPixel(8, ledPin);
Adafruit_NeoPixel strip = Adafruit_NeoPixel(numLeds, ledPin, NEO_GRB + NEO_KHZ800);


// Input a value 0 to 255 to get a color value.
// The colours are a transition r - g - b - back to r.
uint32_t Wheel(byte WheelPos) {
  if(WheelPos < 85) {
    return strip.Color(WheelPos * 3, 255 - WheelPos * 3, 0);
  }
  else if(WheelPos < 170) {
    WheelPos -= 85;
    return strip.Color(255 - WheelPos * 3, 0, WheelPos * 3);
  }
  else {
    WheelPos -= 170;
    return strip.Color(0, WheelPos * 3, 255 - WheelPos * 3);
  }
}

void rainbow(uint8_t wait) {
  uint16_t i, j;

  for(j=0; j<256; j++) {
    for(i=0; i<strip.numPixels(); i++) {
      strip.setPixelColor(i, Wheel((i*1+j) & 255));
    }
    strip.show();
    delay(wait);
  }
}


void setup() {
  strip.begin();
  strip.setBrightness(80); // 1/3 brightness

}

void loop() {
  rainbow(30);
  delay(10);
}
Instalación de Tiras Led RGB no direccionable en escritorio:
Prueba de Tira Led Direccionable:
Enlaces
Como alimentar el Nodemcu –> http://henrysbench.capnfatz.com/henrys-bench/arduino-projects-tips-and-more/powering-the-esp-12e-nodemcu-development-board/
http://novalight.com.mx/seleccion-y-diferencias-tipos-tira-led/
https://www.hackster.io/remnis/controlling-neopixels-with-a-webserver-on-an-esp8266-0381c7
